Introduction to the MIT Illuminations App
Goals of This Chapter
- Download the MIT Illuminations App
- Create & Edit an MIT Illuminations Light Show
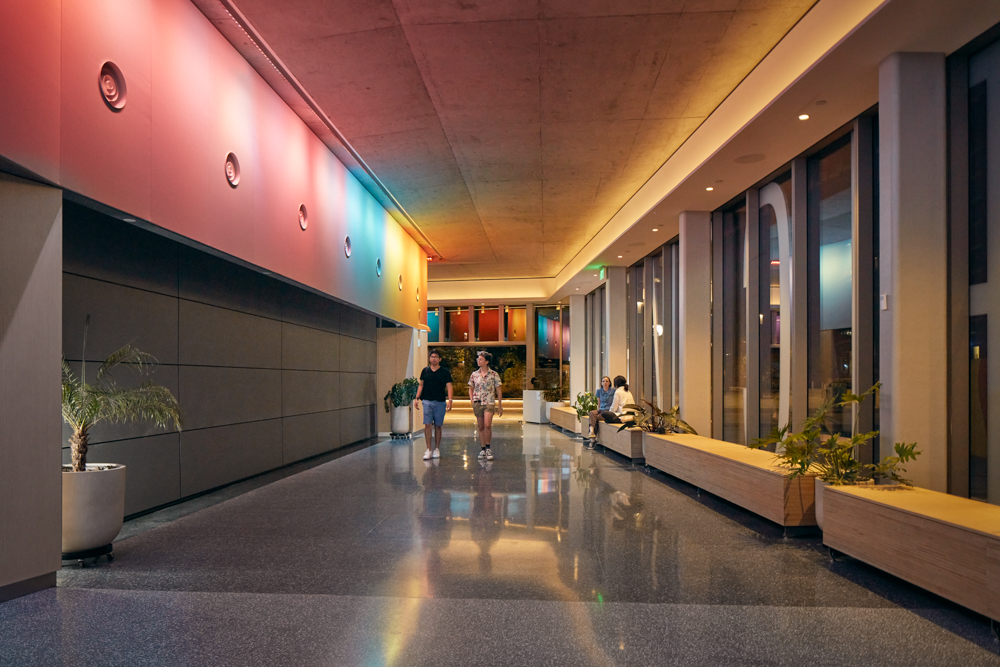
How do the MIT Welcome Center lights work?
MIT Illuminations has a dedicated app that's built to design and run the lights, and it's available for you to play with! While you won't be able to directly control the live lights in MIT Welcome Center (unless you work directly with the Admissions office), you can use the app to create your own light shows at home and share them.
Desktop Application
The software that runs the MIT Illumination lights is an open-source application that takes p5.js code (an open-source JavaScript library - we have a whole chapter on it in this guide!) and outputs visualizations to various professional and hobbyist lighting units. Basically, it makes creating fun light shows easy and accessible.
Note:
When downloading software from the internet, it's always good to double-check how trustworthy the source is. In this case, this website has the domain format of *.mit.edu, which means it's genuine MIT content. GitHub is a public platform for developers to share their code, which means anyone can upload anything. The MIT-Illuminations code we're linking to was uploaded by the SOSOteam (an alumni-founded company who collaborated with MIT on this project) and we promise it's safe. Be careful out there, and only download and run code that you trust!
Open-source software like this normally has a README.md file that contains information about how to run the application and contribute to it if you want. Think of this guide, learn.illuminations, as an expanded or alternate version of the README file that goes into a little more detail to help you set up your own light show.
We won't need to touch any of the source code in GitHub, because the code has been compiled into the MIT Illuminations app, which can run on a Mac or a Windows computer.
You can download the app here.
Overview of the App
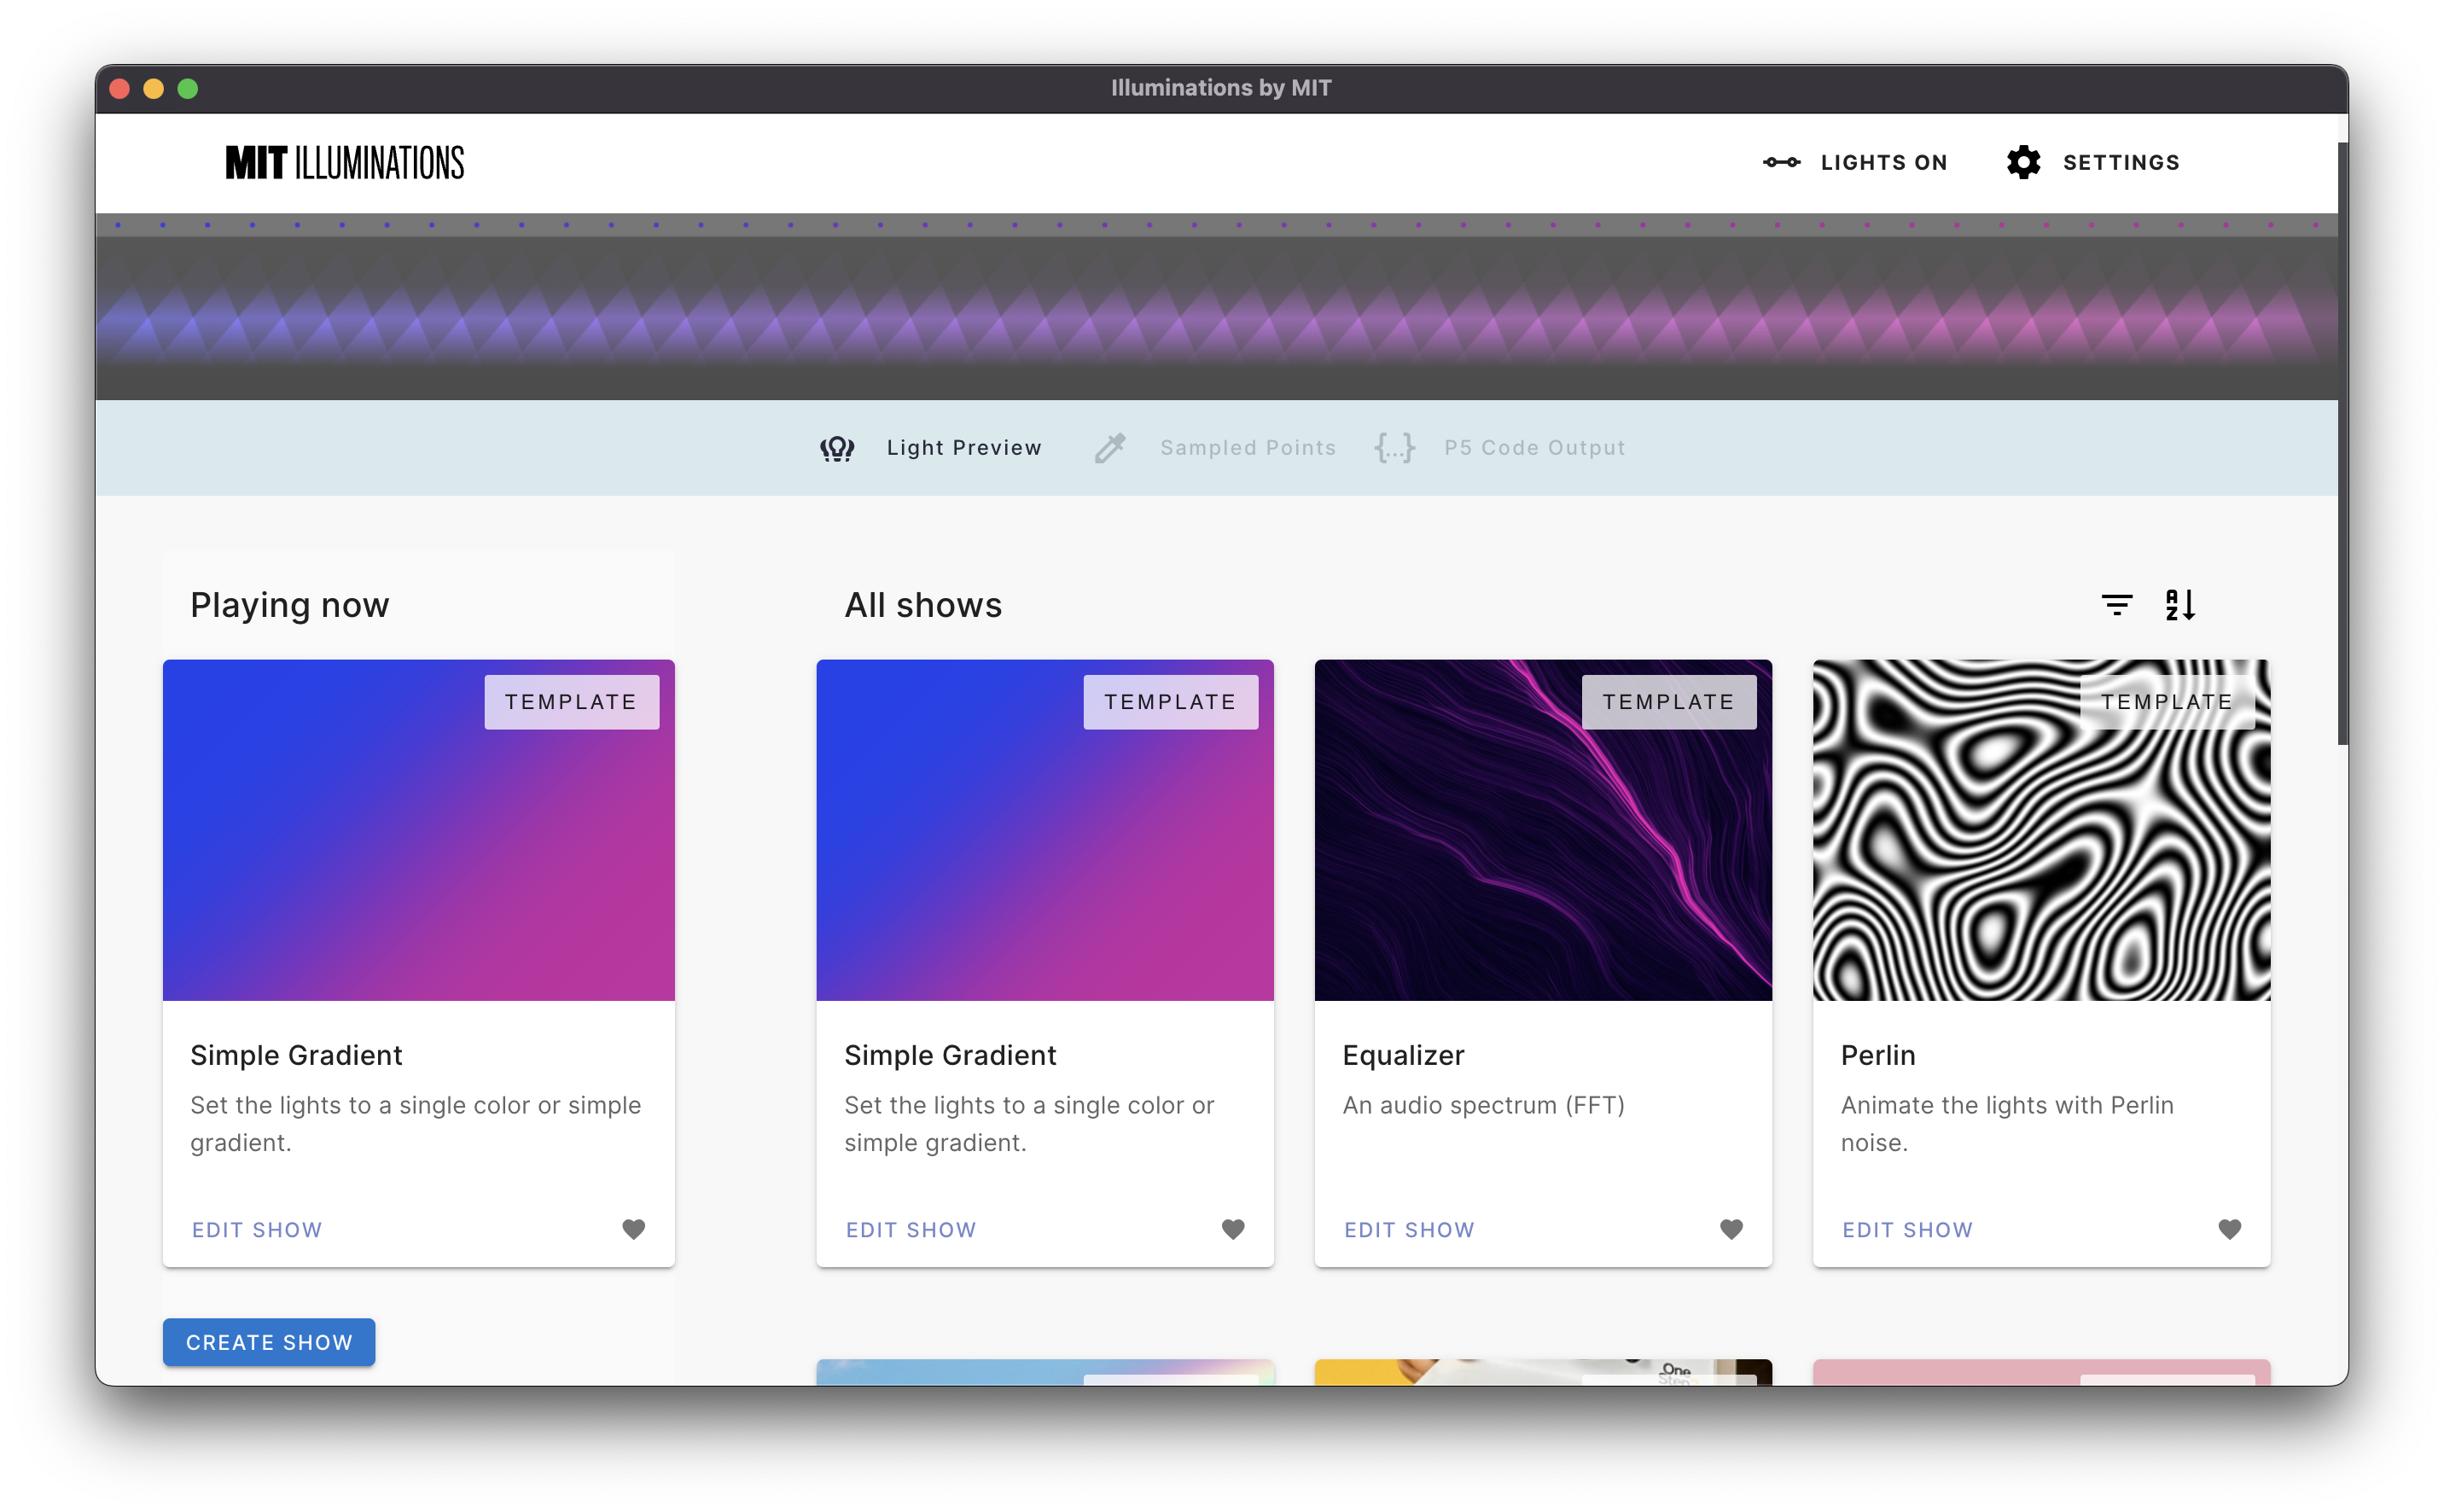
By default, the main screen of the MIT Illuminations app contains a variety of different light shows, along with the current show that's playing (on the left, labeled "Playing now"). For starters, let's click into one of these shows and take a look closer at the editing panel.
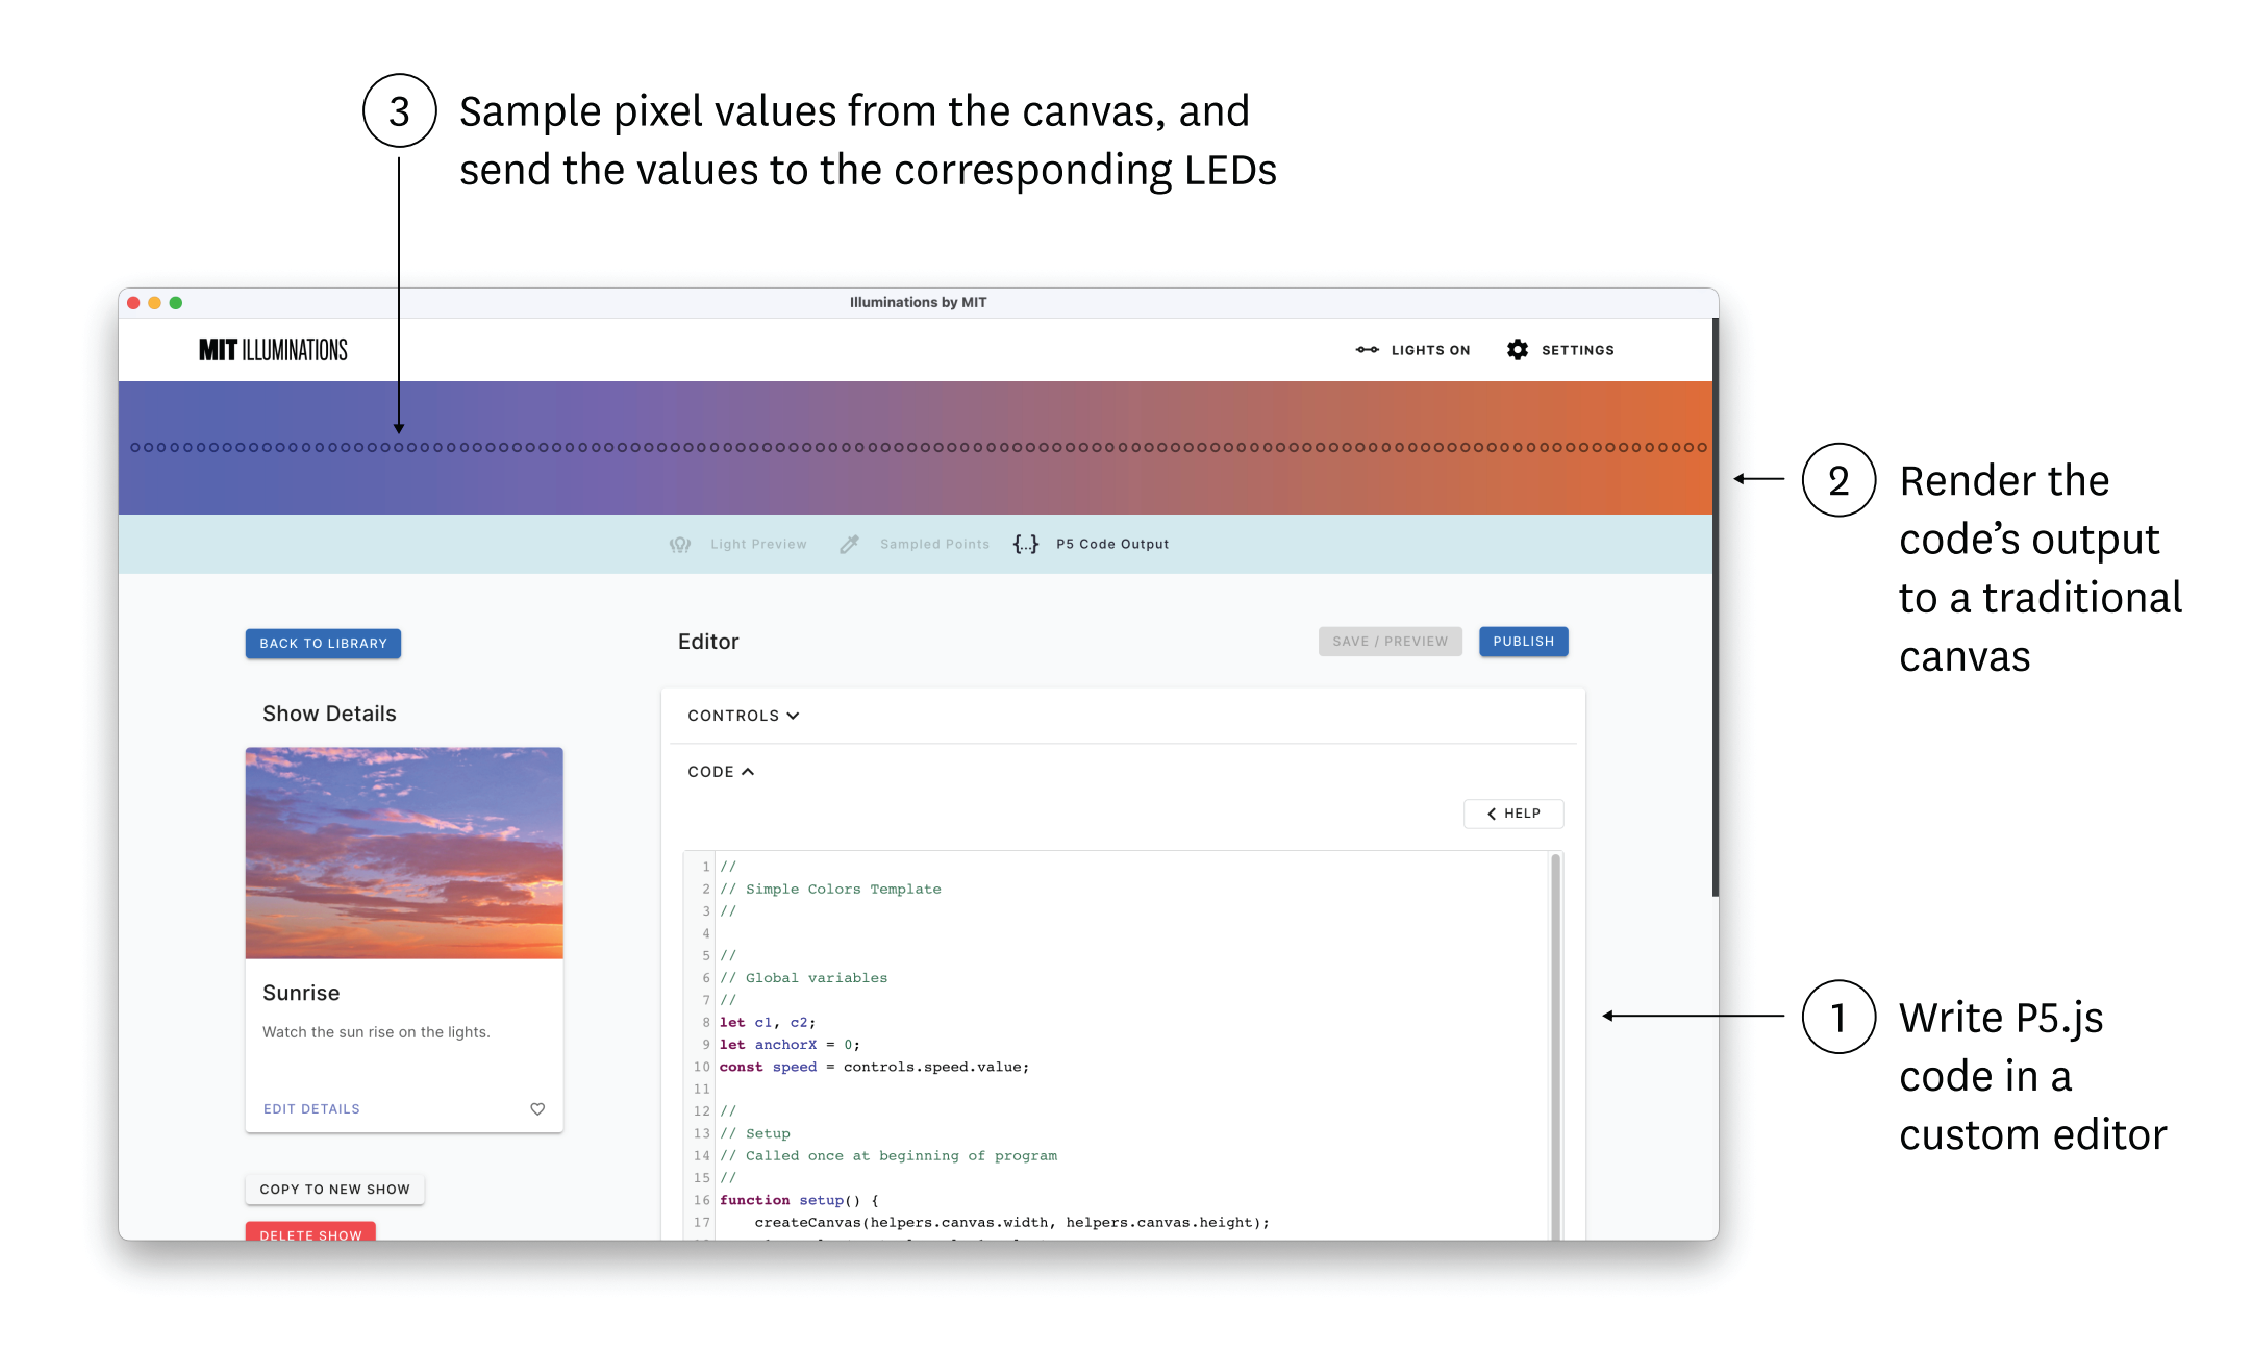
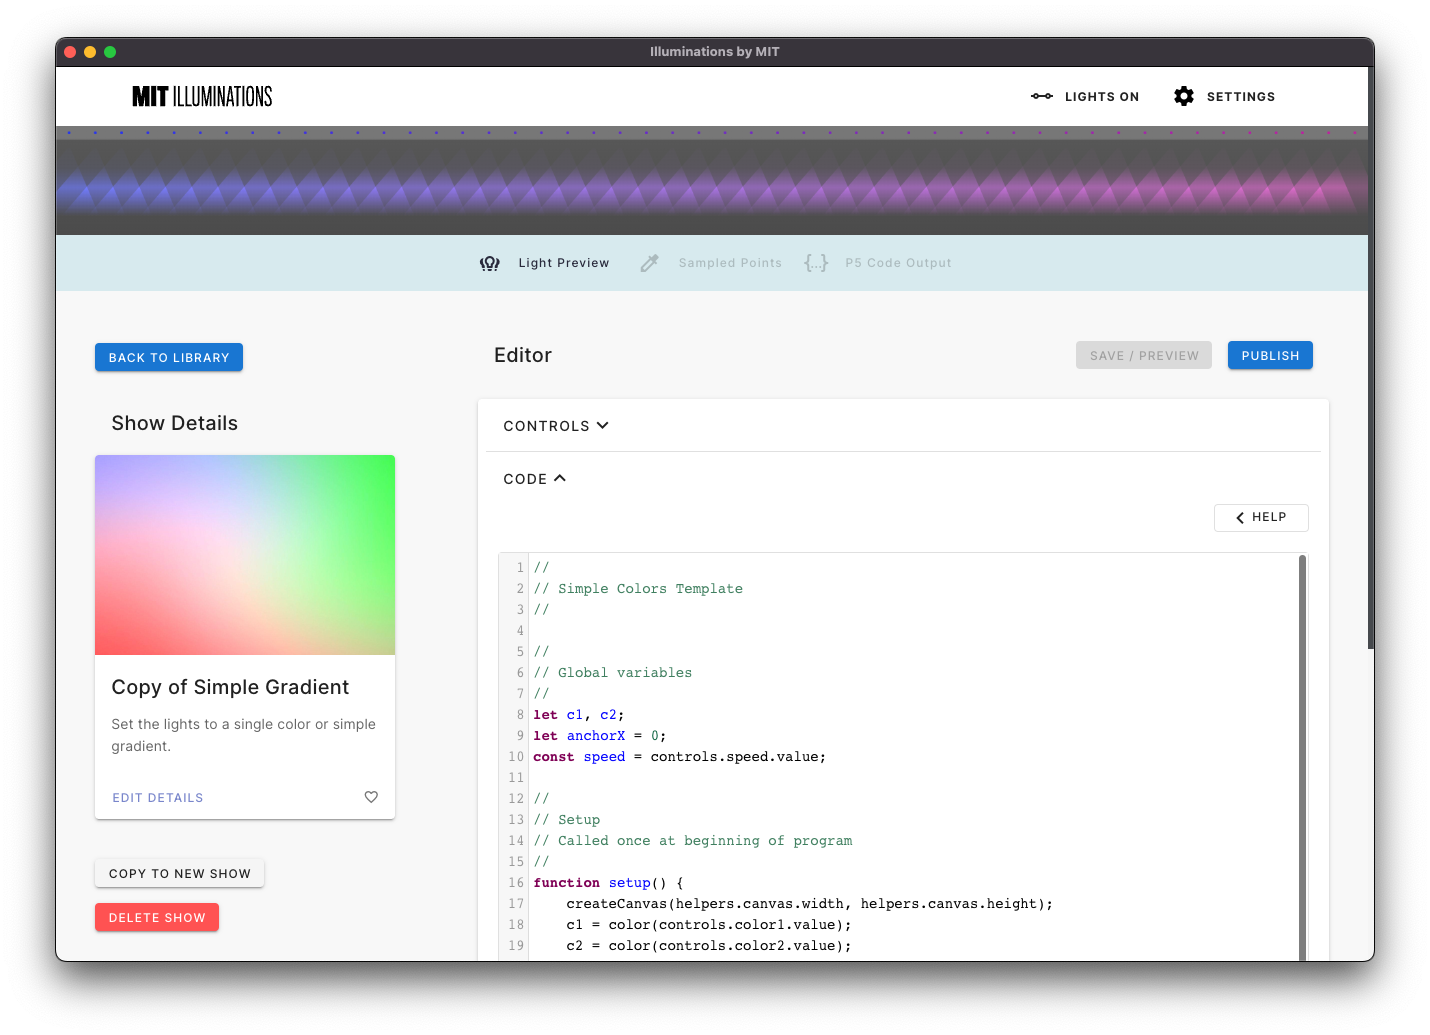
The bulk of the screen is the p5.js editor (1). That's the code running the light show! We have a whole p5.js chapter later in this guide, but one of the best ways to learn is to play around, changing some values here and there to see if you can alter the lights' behavior.
The color bar (2) is where the output of the code is rendered. Think of it as the 'canvas' that's being drawn on according to the code's instructions. Then, the app samples colors from the pixels of that canvas (3) and sends the output data to whatever LED lights are wired up to the computer.
How to Create & Edit a Show
The MIT Illuminations app contains a variety of different template shows (with their own partially unique code) that can serve as a base to create new shows. Click into one of these templates and then click the COPY TO NEW SHOW button at the top of the screen to create a new show entitled Copy of [template name]. From there, you can retitle it and begin experimenting with the settings to make your own light show.
Depending on which show you copied, the CONTROLS section will give you some user-friendly interfaces to adjust variables within the code, like the color (inputted as RGB/HEX) or speed (inputted via a slider bar) of the lights. You can change these and click SAVE / PREVIEW if you'd like to see the updated changes on the 'canvas' at the top of the screen, or hit PUBLISH if you'd like to set this to be the current playing show on whatever lights you have connected.
The CODE section will give you more granular control over how the lights are functioning, such as if you want to adjust the speed beyond what a control module allows you to, connect a different API for data, or otherwise do cool/weird/fun things with the lights and light outputs.
- As we've mentioned, all this code is written in p5.js.
- The text beneath the title of each user-friendly interface in the
CONTROLSsection tells you the relevant value that you can look for in theCODEsection (e.g.control.color1.valueorcontrols.scanSpeed.value). - Click
RUNto check your code animation, and click theCONSOLEorHELPbuttons if you need some assistance debugging.
